While developing pages on passive heating and cooling and writing about Passive House, we were in contact with Harold Orr, a world-renowned environmental engineer, pioneer of the very concept of 'green building'. and who was recently awarded the Order of Canada for his pioneering contribution to energy-efficient home construction.
He was one of the principal designers of the Saskatchewan Conservation House, which in 1977 acted as a laboratory for the development of many previously unheard of building techniques that are now standard on the best performing houses in the world.
The Saskatchewan Conservation House is credited as being the catalyst behind the Canadian R-2000 program as well as the PassivHaus program that started in Germany and eventually became the global Passive House movement.
Here is a presentation Harold recently gave on the Saskatchewan Conservation House, which he has graciously allowed us to republish. His contributions to the building industry are immeasurable.
The Saskatchewan Conservation House in Retrospect
by Harold Orr
If you were to wake up today, get in your car to go to work, found that you need gas for the car, proceed to your favourite service station and find that the price of gas has doubled from yesterday. You look across the street and find the competitor has the same price. What do you do?
1. You complain to the service station attendant!
2. You fill your tank 1/2 full.
3. You call your Member of Parliament and complain loudly!
4. You buy a bicycle.
This is essentially what happened in 1973 when the OPEC countries raised the price of crude oil. Everyone was up in arms over the sudden increase in price and everyone started to look for ways to reduce energy costs.
The Saskatchewan Provincial Government asked their research arm the Saskatchewan Research Council (SRC) to "Design and Build a Solar House appropriate for Saskatchewan". Since the SRC had at that time no people with expertise in building they asked people involved in building research, and building construction to sit on a committee to fulfill this request of the Government.
A committee was formed from knowledgeable people and this committee proceeded to design the "Solar House Appropriate for Saskatchewan". The committee consisted of:
Mr Dave Eyre, Saskatchewan Research Council, (SRC) Chairman.
Mr Dave Jennings, Saskatchewan Research Council
Mr Deryl Thomson, Saskatchewan Research Council
Mr Harry Filson, Saskatchewan Research Council
Mr. Hendrik Grolle, of Hendrik Grolle Architect and Engineer
Mr Bill Gibbons, Housing and Urban Development Association of Canada (HUDAC)
Mr Rob Dumont, University of Saskatchewan (U of S)
Prof. George Green, University of Saskatchewan
Prof. R.W. Besant, University of Saskatchewan
Mr Garry Marvin, Canada Mortgage and Housing Corporation (CMHC)
Mr Harold Orr, National Research Council. (NRC)
Because of our cold climate 11,000 Degree days (6,003 DD), very small solar gains in the winter months and a very low sun angle, the solar gain that we get from November to March is very small and this is the time we need the heat for our homes.
So can you store heat from the summer to heat the house in the winter? The solar storage would have to be very large and very well-insulated. As a committee we examined these problems and came to the conclusion that solar heating of a home in Saskatchewan was not appropriate, but we could and would build a Conservation House appropriate for Saskatchewan.
 |
|
The world's first Passive House, the Conservation House Saskatchewan
|
Saskatchewan Conservation House 1
You must remember that R7 with double glass was considered well insulated at this time. When we were discussing amounts of insulation, R20 was suggested for the walls. This was three times the current required insulation.
I suggested that there were some people building homes at this time with R20 but I considered them to be inadequate, and suggested we should use at least R40, six times the current insulation requirements.
My prescription was at least R40 walls, R60 attic, triple glazed windows or windows with shutters, no basement, a crawl space with R20 in the floor system, and a very tight air / vapour barrier.
 |
|
How homes lose energy in cold climates
|
In my prescription I said "No basement" and a "very tight air / vapour barrier". If we could reduce air leakage by 80% and heat loss to ground (basement) by about 80% we would have a 64% reduction in heat loss without touching the windows and doors, walls, and ceiling. If we use 6 times as much insulation in the walls and ceiling and use much better windows and doors, we would be down to a total heat loss that is about 20% of the heat loss of a conventional house.
The trick is to attack the big wedges of pie first and then do your best on the smaller wedges.
When we did this to the proposed SCH, we estimated that we could heat the house with a candle, a 45 Imperial gallon candle, and in 1976 about $33.00 worth of fuel.
We presented this 'Conserving House' to the Government for approval and were told "That looks good but heat it with solar energy". The solar people on the committee then designed a solar furnace consisting of about 17.9 m2 or 193 sq. ft. of vacuum tube solar collectors and a 12,700 litre or 3,355 US gallon storage tank insulated to about R100, with appropriate pumps and heat exchangers to supply heat to the house and provide domestic hot water.
Well how did the house perform? The solar system heated the house during the first two years:
Fuel cost: $0.00
Electricity for Pumps: $40.00
Maintenance: $10,000.00*
Total $10,040.00 per year
If we had heated the house with oil the expected costs would have been:
Fuel cost: $33.00
Electricity for fans: $40.00
Maintenance: $100.00
Total cost $173.00 per year
If we had heated with natural gas the expected costs would have been:
Fuel cost: $11.00 (does not include minimum bill charges)
Electricity for fans: $40.00
Maintenance: $50.00
Total: $101.00 per year
* This is the real cost of maintenance services for the first year but is not a realistic cost since the solar system was new, untested, experimental, and the maintenance people were inexperienced BUT.....The house was built in 1977 at an approximate cost of $60,000.00 but the solar system cost about $65,000.00.
What did we learn?
1. Conservation is much less expensive than solar. For every dollar we spent on reducing heat loss from the house, with a better air barrier and more insulation, we saved at least $10 on the size of solar collectors and equipment needed to achieve the same thing. Now let us look at some of the details of the house.
Ceiling insulation:
This is really easy - all you have to do is use high heel trusses for the roof and insulation stops at the eaves and you need to then blow lots of insulation into the attic.
All blown insulations create static electricity so the individual particles repel each other and are nice and fluffy when blown but they settle with time, so you need to allow for this.
In the SCH we used a high heel truss to make space for R60 insulation and the South face was set to the optimum angle for the installation of the solar collectors.
Wall insulation:
There are many ways of increasing the R value of walls. First you can use thicker studs (2x6's or 2x8's) this allows approximately 60% or 100% more insulation than 2x4's.
 |
|
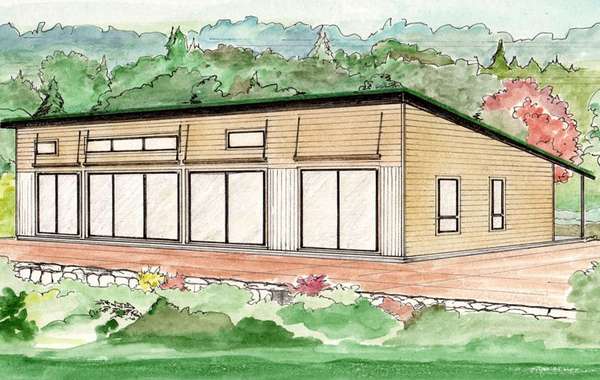
Passive House Design Plans, the original Passive House looks like this on the design
|
Second you can use rigid foam insulation on the exterior of the wall. The problem is that foam insulations are 5 to 15 times more expensive per Rvalue than the mineral fibre
insulations that are used in walls. So the wall becomes expensive very quickly.
Third you can insulate the wall, install the air / vapour barrier, then strap the wall on the inside with 2x3's. The problem with this is that 2x3's are the same price as 2x4's, and strapping the wall horizontally is more labour intensive than building a double wall. If the strapping is installed vertically you have a double wall without the advantages stated below.
Fourth you can build a double wall to make space for the insulation you want. Two 2x4's are very near the same price as a 2x6 and are cheaper than 2x8's. The double wall has several advantages:
1. The inner wall can be used for the structure so that roof trusses and floor joists for upper floors need not span so great a distance.
2. The air / vapour barrier can be installed on the exterior of the inner wall. This allows it to go past interior partitions and electrical boxes and the boxes do not need to be
wrapped and sealed against air leakage.
3. The common method of construction of double walls uses a thin sheet of plywood or OSB on the top and bottom plates, and around window and door openings to hold the two walls correctly spaced apart.
This makes the walls twice the thickness of the plywood than normal walls that do not have plywood. This added height allows the interior partitions to be installed after the ceiling has been drywalled. THIS ALLOWS THE AIR / VAPOUR BARRIER TO BE INSTALLED IN LARGE SHEETS ON THE CEILING and saves time and materials in installing the ceiling and best of all makes the ceiling very much tighter than with other methods.
In the SCH we used a double wall construction, however the outer wall was used for the structure and the air / vapour barrier was installed on the inner surface of the inner wall. This meant that all electrical boxes had to be sealed to the air / vapour barrier and the barrier had to be carefully sealed where interior partitions and the second floor joists passed through it.
In 1977, there were no contractors with experience or training in making air barriers tight, so a technician from the National Research Council, Jerry Makohon, and I travelled to Regina and we installed the air / vapour barrier.
When we were finished, the house was tested and it was likely the tightest house in the world at the time, rated at 0.8 A/C 50 compared to the typical house at the time which was 3 - 5 A/C 50. We were just inventing the technique at the time and our subsequent designs have allowed much tighter houses down to 0.1 A/C 50.
Basements:
In Regina if you ask the builders what the number one problem with their houses is, they will tell you basements. The problem is Regina has been built on the bottom of the prehistoric Lake Agassiz. This lake has about 10 metres of clay that was deposited in the bottom of the lake.
Over the centuries since the lake drained into Hudson Bay, the clay has been desiccated by the prairie grass growing on it and the low level of precipitation, about 430 mm per year. As soon as the city was built on the lake bed, the effective precipitation became 1,300 mm per year, so the excess water causes the clay to expand, potentially about 10% in total or about 1 metre.
This occurs at the rate of about 140 mm in twenty years, unfortunately this is not uniform, and the differential expansion of the clay causes serious damage to concrete foundations.
In order to avoid foundation problems in the SCH, we decided to use a concrete grade beam and concrete pile foundation. At the time it was considered that insulating the basement walls all the way to the footings and insulating the basement floor would result in frost damage to the foundation.
This has since been disproven, but it was a serious concern in how to insulate a basement if one was installed. The floor joist space was blown full of cellulose fibre to insulate the living space from the crawl space.
Because the SCH did not have a basement, it is really not totally comparable to more conventional houses built at the same time in Regina.
Windows:
Unfortunately, at the time we built the SCH the best windows were only about R2. These windows were essentially holes in the walls. We placed most of the windows on the South side, and because of their poor Rvalue we installed shutters on the outside of the windows.
The large windows on the main floor had electrically operated shutters that hinged at the top and folded up against the soffit above the windows. The problem with these shutters was the weather seal when the shutter was closed.
Since the shutter was outside, the weather strip was at outside temperature and would not seal. So cold air would enter the space between the glass and the shutter, be heated by the poor R value of the glazing and leak out at the top of the shutter. So in spite of the shutter being about R20, the leakage reduced the effective R value to about R4 with the glazing.
The other larger problem was that the shutter was not transparent and windows are made to look out of, so the shutters were rarely used. The shutters for the upper floor were made to slide horizontally into the thick wall.
The problem was that the window had to be opened to operate the shutter. Seals were also a major problem. The other choice was to have the shutters on the inside of the window. The problem with this was when the shutter was opened in the morning, the glass would be at outdoor temperature and would frost up as soon as the shutter was opened and the melting frost would cause water problems on the window sill.
Other features:
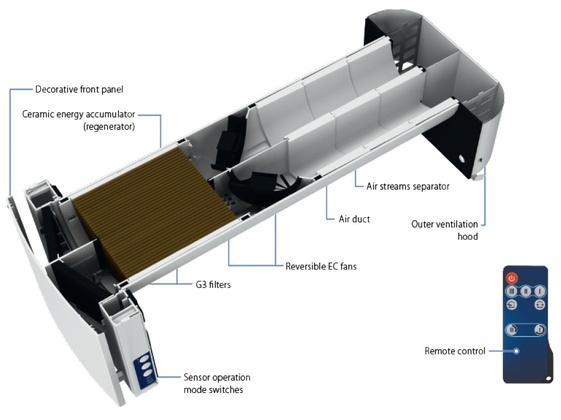
An air to air heat recovery unit that used polyethylene film for the heat exchange media. This unit used buoyancy effects and was hot at the top and cold at the bottom. The engineering technician Mr Dick VanEe built the heat recovery unit, and based on his experience building it started a company to make heat recovery ventilation units.
A grey water heat recovery unit. This unit collected waste water from the bathroom sinks, tub and laundry unit in a 30 gallon storage tank and had a counter flow coil of fresh water to recover some of the waste heat in the waste water.
This unit was not very successful as the waste water had soap added to the water before it entered the tank and the soap caused the water to gel.
Air lock entry at the doors. With an air tight building an air lock is not really of much value, the whole house acts as a air lock and air doesn't blow though the house because there are no holes for the air to flow through.
Soffits designed to allow full sun in the winter and complete shade for the windows in the summer.
Large trees to the North of the house provide a wind buffer from North winds.
No trees or plantings to the South so that the house is not shaded from the sun.
Extensions on the roof to keep snow off the solar collectors.
A walkway below the solar collectors to service them. Notice the snow collected on the walkway.
Changes to the house:
The first two years the house was used as a demonstration house to show what could be achieved in energy conservation and more than 30,000 people visited the house.
At the end of the two years the house was sold to a family and the solar collectors were removed, the grey water heat recovery unit was also removed. The new owner excavated under the house and put a garage under the house with a ramp to the garage from the South.
Saskatchewan Conservation House March 2013
Technology transfer
The Saskatchewan Conservation House was the start of a revolution in building in Canada and around the world. For those of us that were on the committee that designed it, we wanted to see if there were better ways to apply some of the features that were used on this house.
- The grey water heat recovery unit has been reengineered and is now available for installation in new homes and can be retrofitted in older homes.
- Several companies are now manufacturing air to air heat recovery units.
- Many window manufacturers are now building triple glazed, double low E, argon filled windows with very tight well insulated window frames.
- Exterior door units are now very well insulated with excellent weather strips.
While we achieved a remarkable degree to tightness with the house, we have since developed changes that allows a much greater degree of air tightness with much less effort than it took with the SCH.
Moving the air / vapor barrier to the outside of the interior wall and installing the ceiling air / vapor barrier and drywall on the ceiling before installing the interior partitions has resulted in building houses that have less than 0.12 A/C 50. This is nearly seven times tighter than the SCH.
To learn more about Passive House and sustainable and resilient home design in general, visit the Ecohome Building Guide or check out these pages below:
Find more about green home construction and reap the benefits of a free Ecohome Network Membership here. |







Comments (0)
Sign Up to Comment