Dying eggs is one of my favourite spring traditions. Sadly, many conventional food dyes and artificial colourings are far from benign. According to a 2010 study conducted by the Center for Science in the Public Interest, Food Dyes: A Rainbow of Risks, "The three most widely used dyes, Red 40, Yellow 5, and Yellow 6, are contaminated with known carcinogens."
 |
Luckily, a plethora of natural egg dye recipes can be found online, and for the second year running I've dyed eggs naturally to beautiful effect - or at least I think so! You'll find notes about both the process and the ingredients I used below and photographs of the resulting coloured eggs.
Also included are recipes found online that I have yet to try, in case you are feeling extra adventurous.
Keep in mind that you'll get different results from dyeing white eggs than dyeing naturally brown eggs, I used both just to see the difference.
I've got to say that for some of the more vibrant colours, particularly yellow, green and blue I much preferred the white eggs. For some of the earthier tones like pink, red, orange & brown, I really liked the results when using the brown eggs.
Blue:
- Red cabbage (as much as you choose, water to cover)
- Blueberries (1 cup fresh or frozen per 2 cups water)
I tried both purple cabbage and blueberries in search of a tone I liked. The eggs dyed in the purple cabbage came out a beautiful blue. Those that I dyed with blueberries came out a charcoal grey. I know a few people who have had brilliant blue results with blueberries, I think it's possible that our water softener had something to do with our not so blue results. I don't know, but it's fun to experiment so, hey!
Pink:
- Beets (try 2 sliced or grated beets per 1.5 cups water)
- Raspberries, mashed, boiled (1 pint per 1.5 cups of water)
I have seen recipes that call for one or the other. I tried a mix of beets and raspberries. The egg I cooked in the dye bath for 20 minutes came out a fairly light pastel sort of pink. The egg I cooked and then soaked in the dye bath in the fridge over night came out darker and more vibrant, but a mottled colour (which I liked).
Lavender:
- 1 cup grape juice (no heating necessary)
- Violet blossoms
- Hibiscus tea
- Red wine
Personally, I have had no success creating lavender, but that has a lot to do with never having tried it. No personal experience to share here. If you've had success, or not, please share with us in the comment section below.
Green:
- Purple cabbage and tumeric (the dye bath will look purpley-brown, the dyed eggs will be green)
I mixed the purple cabbage dye bath with the tumeric dye bath. We liked the results which I have dubbed "dino green" since my toddler excitedly exclaimed "dino eggs!" when he saw them. I have also heard of spinach and parsley resulting in a "green-ish" hue, but haven't tried that yet myself.
Golden yellow:
- Tumeric powder (3 tbsp. tumeric per cup of water)
Are you looking for a pastel yellow, or maybe a nice bright but not too saturated sunny yellow? Start by cooking the eggs in the dye bath for 20 minutes and checking the result. For a more saturated hue like a deep vibrant golden colour, cook the eggs for 20 minutes, then soak them in dye bath over night.
Yellow (various hues):
- Carrot tops
- Celery seed
- Cumin
- Chamomile tea
- Green tea
I used green tea last year for a delicate yellowy green hue. Haven't tried any of the other suggested ingredients. If you have, please do share your results. Inquiring minds want to know!
Orange:
- Paprika (3 tbsp. paprika per cup of water for a burnt orange colour, a longer soaking will produce brownish hues)
- Yellow onion skins. Approximately three onions per cup of water.
- Chili powder (3 tbsp. per cup of water)
As per orange, I wanted to cover my bases and didn't have quite enough yellow onion skin so I mixed all three suggested ingredients. It worked.
Brown:
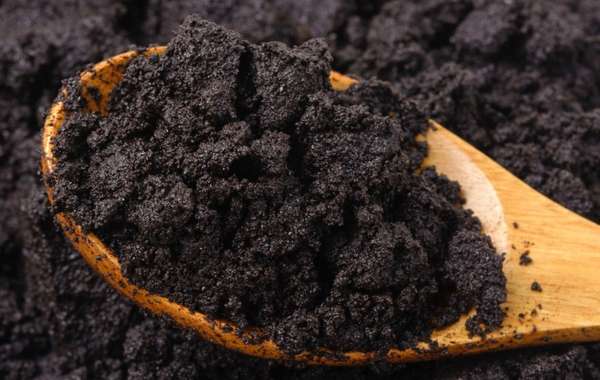
- Boiled coffee grinds
- Instant coffee
 |
The process:
Hot dye method (process used for the eggs pictured)
- Add the appropriate amount of dye material and uncooked eggs to enough water to generously cover the eggs during the process. If you're using a vegetable, chop or grate it before adding it to water. When using a spice, use powdered or grind it well.
- When the water is boiling, add a tablespoon of vinegar and a teaspoon or so of salt, turn the heat down and simmer it for 20 minutes. Check your eggs - do you like the colour? Then you're done.
- Looking for a darker hue? Strain your dye bath and continue to soak your eggs for as long as needed to achieve your desired results.
- Remember to remove the eggs carefully from the dye bath and let them dry. The dye will definitely wipe off somewhat unevenly while the eggs are still wet, so letting them dry completely before handling them is a good idea.
Cold dye method:
- Combine an appropriate amount of dye with enough water to cover the eggs in your desired container. Cook them until your dye bath is a few shades deeper than the colour you'd like your eggs to be. If your dye bath just doesn't look dark enough, consider adding more dye material or simmering for a longer time. Once you've achieved the depth of colour you're looking for, remove it from the heat and allow the dye to cool to room temperature.
- Strain out the water.
- Pour water into the containers you'd like to use for dyeing the eggs. I like the wide mouth mason jars as they have airtight lids and reduce the risk of spillage (although they are somewhat breakable). Submerge your hard boiled eggs into the dye bath and soak them for what I would guess would be at least a few hours, maybe over night depending on what level of color saturation you're looking for.
- Remove the eggs carefully from the dye bath and let them dry. Again, remember that the dye can wipe off while the eggs are still wet.
Side notes:
- We are making dyes after all, so porous counter tops and clothing are vulnerable! If your counters or clothes do get stained, try cleaning them with diluted oxygen colour-safe bleach.
- If you prefer your dyed eggs to have a sheen, wait until they dry completely and then apply vegetable oil.
- It would take some creative storing, but with enough forethought it would be feasible to use kitchen scraps for this project.
Good luck and let us know how it goes! And if you are a seasoned natural dye afficianado, please do share your tips and experience in the comments below.
 |
|
|

Now you know how to make your own non toxic easter eggs, find more DIY home projects and all you need to know about sustainable lifestyles in the Ecohome Building Guide and in these pages :
Find more about green home construction in the Ecohome Green Building Guide pages - also, learn more about the benefits of a free Ecohome Network Membership here. |




Thanks for sharing this Hillary. The colors are gorgeous. I will definitely be trying this!!