Restoring a weathered cedar deck easily, step by step
Cedar decking boards turn gray in a few short years if untreated, and can make your deck look much older and closer to the end of its life than it actually is. There are easy tips for restoring an old deck and bringing back the original color of cedar decking. Deck repairs can often extend the useful life of a deck and delay having to replace deck planks for many years. If you’re new at building or minor renovations and looking for easy DIY tips for decking repairs and renovation, to prevent having to repair your deck more often than should be necessary, we would also suggest reading our page about building beautiful decks that last.
Step by step DIY deck restoration:
- Pressure wash the deck first.
- Identify any damaged deck boards that need fixing.
- Assess what needs to be fixed - determine which deck boards can be salvaged and which need replacing.
- If a damaged section of deck is a risk of causing slivers, remove it and see if the other side is usable.
- Pressure wash flipped deck boards for color consistency.
- Replace any unsalvageable boards with new decking.
- Look for loose, protruding or severly corroded screws, replace them or drive them further in as needed.
- Wait for a sunny-weather window and stain the newly cleaned wood deck with a good quality deck stain.

How to replace rotten cedar deck boards
The first thing to go with old decks is usually the top decking boards, and they will most often start to rot at the cut ends where two deck boards meet at a joist. Water can pool on the top of cupped deck boards as well as at the joists, which will increase the rate of decay. Often times with cedar decking, the very ends will rot while the rest of the board may still be in good shape.
A tip to reduce the amount of deck boards that need replacing is to remove the board, cut the damaged ends off so that when you re-install the damaged board it is just shorter, and you can fill in the empty section with a new board. Be sure to cut it to a length where it will fall on a joist and try to offset the joints if possible, though that is really just for aesthetics. It's also wise to use a cut preservative on the end grain of deck boards you've had to trim, as the end grain is generally the most susceptible to soak up the rain causing them to rot prematurely.
Can you flip old deck boards over?
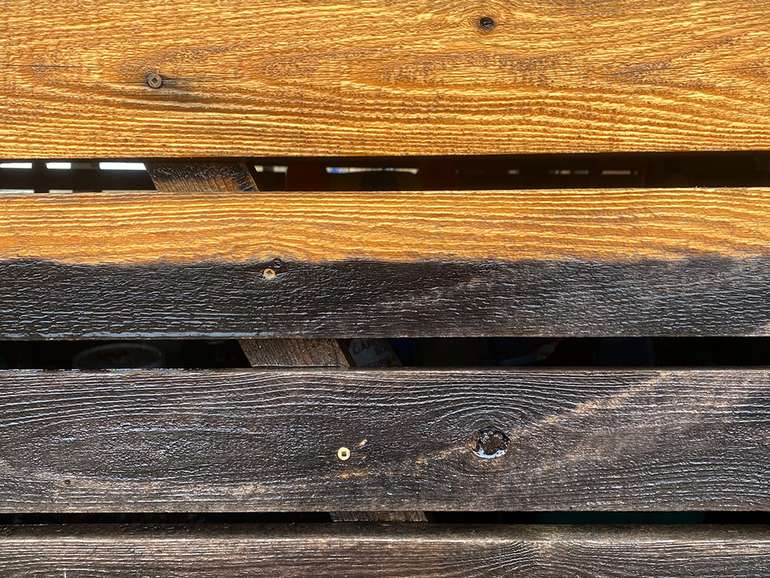
Yes, you can often flip cedar decking boards to delay replacing them. First, be sure that the damage is mostly on the surface and that the deck board is still solid enough to support weight between the supporting joist spans. The underside of planks will be weathered very differently, so going over those individual boards with the pressure washer can help blend the colors. Often what happens with weathered deck boards is that cracks cause small sections of the tree’s grain to pop loose, which makes this a high risk for causing slivers, and damage can be made worse with over-enthusiastic application of the pressure washer.
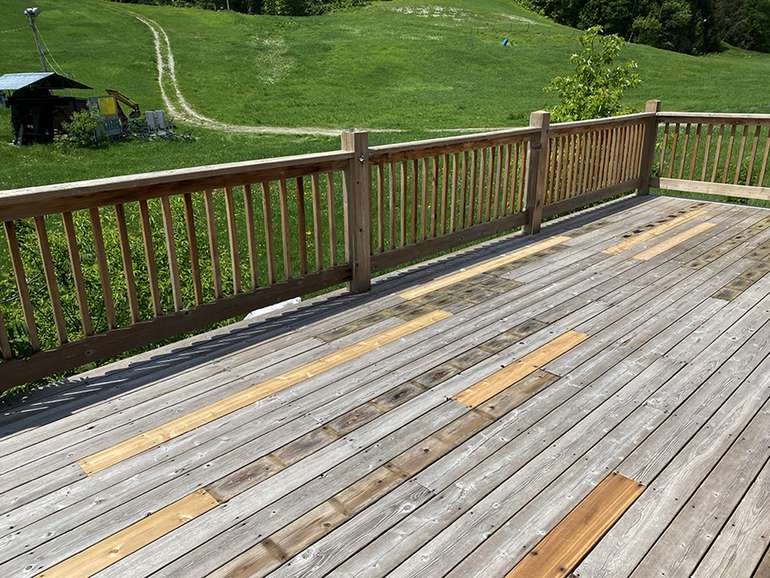
Below you can see a deck that has been carefully pressure washed. You can see some boards of a slightly more gray color that were flipped, and some that were replaced with new boards.

How to protect deck joists from rotting
One of the easiest tips for making a deck last longer is protecting the joists. The flat top surface of deck joists will usually have standing water on it, which will shorten its life. A simple waterproof membrane on top of the joist will greatly slow the rot and extend their life. You may find products like ‘specialized deck joist tape’, which is mostly a *specialized* word to accompany a *specialized* price, as in a higher one.
The membrane does not need to be anything special; you can buy a peel and stick bitumen membrane, or you can use something as simple as a strips of duct tape, but beware - if the colour or pattern is noticeable you will be able to see it. So something like a black duct tape or membrane will be the least noticeable, and it doesn't matter if it is super stick as the deck boards will hold it down when screwed back in.
Covering the top surface of decking joists will prevent standing water from saturating them, so if you waterproof the top surface and just over the edge to the vertical surface, water can drain off and the deck stucture can dry. Keeping water out of cracks by taping the tops of joists before installing decking will prevent the wood from expanding when wet and will also help screws hold tighter.
Taping deck joists is obviously easier to do when building new decks to make them last, or when removing all the deck boards to turn them over, but it is still worth applying to whatever sections you lift. Wet deck joists will transfer moisture right back to any deck boards, so if you cut rotted ends and lay them back down, taping under them will at least protect individual boards and the joists underneath.
Is a pressure washer or power washer best for cleaning a deck?
A pressure washer is a gas or electric powered motor that is hooked up to a normal garden hose and forces water at high pressure out of a nozzle. You can buy them at box stores, or the store may have rentals if it’s not something you will use regularly. People often ask what is the difference between a pressure washer and a power washer; that would simply be water temperature. A pressure washer uses cold water, a power washer uses hot water. You do not need hot water to pressure wash a deck.

Do you need detergent or deck cleaner to pressure wash a deck?
Like so many things on the internet, you will find answers on both sides of the fence. Having done it with and without, I personally would not use detergent. If I were going to use it again, it certainly would not be specialized (and pricey) deck cleaner, and certainly not anything toxic. I would use some biodegradable dish soap and water, give it a good scrub with stiff bristled brush and then pressure wash it off.

That said, I just have not found that the added effort makes enough of a difference to bother. With a good consistent technique, a pressure washer can bring gray cedar back to looking fresh without the need for detergents and scrubbing. That’s only my opinion, but by all means try different procedures in different (and fairly hidden) sections yourself and see what works best in your opinion.
The best way and best angle to pressure wash a deck
Start very slowly when pressure washing a deck as part of your deck renovation and start in an area that is not overly visible because a pressure washer can quickly turn into an engraving tool in the hands of a rookie.

You’ll need to feel it out, but as a starting place – choose a flat and wide nozzle, and hold the pressure washer at about a 45 degree angle, always going in the same the grain. Pressure washing with the grain is extremely important to remove as much grit as possible and to leave wood as smooth as possible.
If you are wondering why your deck is fuzzy after pressure washing, that is most likely due to choosing the wrong nozzle, not going with the grain, or having too high an angle. Going against the grain will rip the wood fibers loose, that is the fuzz you may be feeling. After watching a few YouTube DIY ‘how to pressure wash your deck’ videos, it became apparent to me that a lot of people seem to substitute quality and care with chemicals and scrubbing, and that can all be avoided with due diligence and thought.

Go in a methodical pattern, and go with the grain as much as possible on your deck planks. You won’t always be able to, but blending up to joints where wood changes directions will lessen the damage.
When you first pull the trigger, hold the pressure washer steady and further from the wood then approach it slowly, moving in the direction of the grain. I find being about a foot away on a 30- 45 degree angle to weathered deck planks works best, but of course this will depend on the power of the machine and the nozzle you’re using. If you see all the gray gunk flying off the decking boards and it leaves an orange color with the grain visible again, and no fuzz, you’re doing great.

Using a spinning nozzle on a pressure washer for deck cleaning
One of our team swears by using a special spinning nozzle for deck cleaning with his pressure washer - when used in the same fashion as the fan shaped jet above. He originally ordered it after cleaning a concrete pathway and leaving lots of streaks and lines, and then tried it when pressure washing a dirty old cedar deck that had been neglected for many years. He was pleased by the result on his deck as it evens out the pressure and prevents inadvertently gouging holes and lines in soft cedar decking planks while making it easier to cover a larger area more quickly.
Some people have mentioned specialized surface cleaners, the round things that have a spinning arm inside that you see on fascinating YouTube videos, but in our experience these are fine for concrete, but they block your view of the deck boards which is not a good plan. As wood can be fickle, the simple spinning nozzle gives a more even finish as it can be held at a consistent angle to the boards, they cost less, and they're much easier to store year-round (but do remember which drawer you put it in, as they're also very easy to lose !)
This is the latest model of spinning nozzle you can find on Amazon, but you do need to check that the specification suits your pressure washer - and if you do try it, we will of course get a small donation from Mr. Bezos and company to the Ecohome Network cause!
Do you need to sand deck boards after pressure washing?
That depends partly on how good a job you did with the pressure washer. If you were careful to go with the grain then you shouldn’t have too many fuzzy fibers sticking up. Therefore, sanding the entire deck wouldn’t really be necessary and might make it slippery when wet or if covered with leaves or slime.
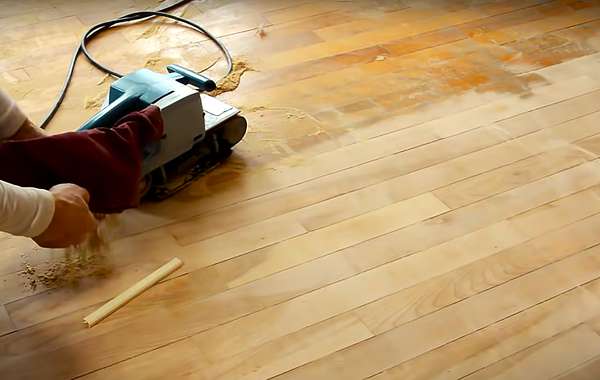
I would suggest using a palm sander to catch any rough spots on the deck and I would also sand the railings anywhere you will be grabbing it with a hand. Again, taking your time when pressure washing could avoid needing to scrub it with chemical cleaners; it can also cut down on the amount of sanding you’ll need to do. If the whole deck needs sanding we would recommend renting a professional size belt sander used along the grain over a drum sander - as cedar will probably gouge far too easily if trying a drum sander that is more adapted to refinishing interior wood floors.
What is the best stain and way to stain a deck?
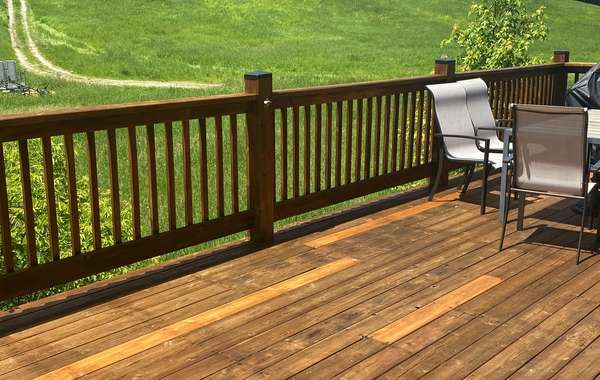
After restoring a deck by replacing some decking, flipping deck boards if they are still in good shape and pressure washing to get it back to an even clean color, it's time to let it dry thoroughly to prevent the new deck sealer from peeling. For the next steps on renovating a deck, see our page how to choose the best deck stain or paint and how to stain a deck.
Now you know more about how to restore a cedar wood deck easily. Find more pages for DIY reno guides and sustainable and resilient green building techniques in the Ecohome Green Building Guide and here on these pages :
Find out about all the perks that come with a free Ecohome Network membership here. |
Although we only use links appropriately and in context, and they don’t influence our content production, Ecohome Network may get commissions for purchases made through some links in this post and on the site in general as per our terms and conditions. As Amazon Associates, we may earn from qualifying purchases, if this comes as a surprise and you'd like to know more, contact us below.




Comments (0)
Sign Up to Comment